Drilling angled holes in wood can seem daunting, especially for beginners, but it’s a crucial skill for many woodworking projects. Whether you’re building furniture, installing a wooden fence, or working on detailed crafts, mastering this technique gives your work a strong and professional finish.

In this guide, we’ll walk you through everything you need to know on how to drill angled holes in wood. You’ll find clear steps, important safety tips, practical advice, and answers to common questions so you can approach your next project with confidence and skill.
Preparing the Wooden Fence
Before you start drilling, it’s essential to make sure your wooden fence is ready for the job. Check that the wood is dry, clean, and free from any major cracks or knots in the area where you’ll be making the holes. Secure the fence section you’re working on so it doesn’t move during drilling. This could mean clamping it down to a stable surface for added support.
Next, measure and mark the exact spots where you want the angled holes. Use a pencil and a protractor or angle finder to ensure accuracy. Marking your spots carefully at this stage reduces the risk of mistakes and makes the process much more efficient. Taking the time to prepare properly makes drilling easier and helps you get professional-looking results.
Tools and Materials You’ll Need
- Power Drill or Cordless Drill
- Drill Bits (Suited for Wood, in Various Sizes)
- Angle Guide, Protractor, or Drill Guide Jig
- Clamps for Securing the Wood
- Pencil and Measuring Tape
- Safety Goggles and Gloves
- Dust Mask (Optional)
- Scrap Wood for Testing Angles
- Carpenter’s Square
8 Simple Step-By-Step Guidelines on How to Drill Angled Holes in Wood
Step 1: Plan Your Angle Carefully
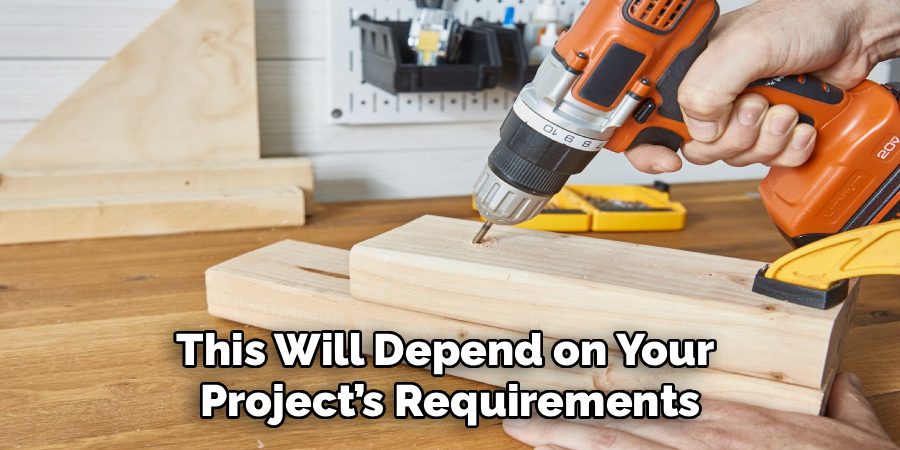
Start by deciding exactly what angle you need for your holes. This will depend on your project’s requirements, so review any plans or sketches beforehand. Use a protractor or angle finder to visualize and mark the angle on both the wood and a scrap test piece.

A precise plan at this stage helps prevent errors and wasted materials. Taking a few extra minutes to double-check your measurements can save you significant time and frustration later in the project.
Step 2: Select the Right Drill Bit and Jig
Different jobs call for different drill bits—choose one that matches the size and depth you need. Consider using a drill guide jig or an angled block if you’re new to angled drilling as these tools help keep your drill steady.
Make sure your drill bit is sharp and in good condition. Using the right bit and support tool not only makes your work easier but also results in a cleaner, more accurate hole.
Step 3: Secure the Wood Properly
Clamp your wood firmly to the workbench or another stable surface. Unsecured wood can slip, leading to inaccurate holes or even injuries.
Test your clamp setup by gently trying to wiggle the wood. If it moves, add extra clamps or reposition as needed. Good support helps you drill smoothly and safely, especially at odd angles.
Step 4: Test the Angle on Scrap Wood
Always drill a test hole in a piece of scrap wood before working on your actual project. This allows you to confirm your angle and practice your drilling technique.

Check the hole in your scrap piece with a protractor or angle gauge. Adjust your setup if needed until you’re consistently drilling at the correct angle.
Step 5: Mark Your Drill Points Clearly
Use a pencil to mark the start and end points of the hole on your project wood. If you’re drilling multiple holes, space them out evenly to avoid weakening the wood.
A clear visual guide means you can focus on drilling rather than second-guessing your positioning. Accurate marks contribute to a neat, professional finish.
Step 6: Align the Drill and Begin Drilling
Set the drill at the marked angle, using your guide or jig. Begin drilling slowly, letting the bit make a small indent before increasing speed. Steady hands and slow starts reduce the chance of the bit wandering off your intended path.
Once you’ve created a starter indent, you can gradually increase pressure. Progress at a steady pace, letting the drill bit do the work rather than forcing it through the wood.
Step 7: Monitor Your Progress and Adjust as Needed
As you drill, pause occasionally to check your angle and depth. If you notice the bit veering off, stop and realign before proceeding. Drilling at an angle requires patience and careful control.
If working on a deep or long hole, back the drill bit out periodically to clear away wood shavings. This makes drilling easier and keeps the bit from overheating.
Step 8: Clean Up and Inspect Your Work
After drilling each hole, clean away any wood dust or shavings. Inspect the hole to ensure it’s clean and at the desired angle. If necessary, use a file or sandpaper to smooth the edges.

Double-check your angle and depth one last time. Quality control at this stage ensures the structural integrity of your project and its professional appearance.
Following these steps on how to drill angled holes in wood will save you time and frustration, as well as ensure the success of your woodworking project. Remember to always take proper safety precautions when using power tools and to practice on scrap wood before attempting a more intricate project.
Tips for Better Accuracy
- Always double-check your measurements and markings before drilling.
- Use a quality angle guide or a specialized jig for consistent results.
- Testing on scrap wood can reveal potential problems without risking your project piece.
- Keep your drill bit sharp and replace it when it becomes dull for cleaner holes.
- Patience is key—take your time to avoid rushing and making mistakes.
Safety Precautions
Always wear safety goggles to protect your eyes from flying debris and gloves to shield your hands from accidental slips. Make sure your workspace is well-lit and clear of obstructions. Keep loose clothing, jewelry, and long hair secured to prevent them from getting caught in the drill. Never force the drill—let it move at its own pace to prevent bits from snapping. If at any point you feel uncertain or fatigued, stop and reassess your setup for safety.
Common Mistakes to Avoid
When using a drill, several common mistakes can compromise both the quality of your work and your safety. One frequent error is failing to use the correct drill bit for the material, which can lead to uneven holes or damage to the bit and surface. Applying excessive pressure is another mistake that can cause the drill bit to overheat or snap. Skipping the pilot hole when driving screws can result in splitting the material, especially with wood.
Additionally, not securing the material properly can lead to movement during drilling, resulting in inaccurate or unsafe outcomes. Lastly, neglecting to check the tightness of the chuck may cause the bit to loosen mid-operation, which can be hazardous. Always double-check your setup and procedure to avoid these pitfalls.
Frequently Asked Questions
Q1: How Do I Ensure the Angle Is Consistent for All Holes?
Using an angle guide or adjustable drill jig is the best way to drill multiple holes at the same angle. Marking each spot carefully and using clamps to keep everything steady will help maintain accuracy. When in doubt, practice on scrap wood before starting your main project. It may take some patience, but a consistent setup is key to achieving uniform angles.

Q2: Can I Drill Angled Holes Without a Special Jig?
Yes, it is possible, but it can be more challenging to get accurate results. You can create a simple angled guide by cutting a block of wood at your desired angle. Holding the drill steady against this support can help you stay on track. Take your time and check your progress often to get the best outcome.
Q3: What Type of Drill Bit Works Best for Angled Holes in Wood?
For most projects, a standard twist drill bit works well, but brad point bits offer extra precision. You should always consider the requirements of your project—use longer bits for deeper holes and avoid spade bits for delicate work. Regardless, make sure your bit is designed for wood and is sharp.
Q4: Why Are My Holes Splintering or Chipping at the Exit?
Splintering can occur if you drill too quickly or fail to back up the wood with scrap behind the exit point. To reduce chipping, drill at a steady speed and use a sharp bit. Supporting the exit side with another piece of wood also prevents harsh splinters. It’s a simple step that improves the finished quality of your project.
Conclusion
Drilling angled holes in wood is a valuable skill that can take your woodworking projects to the next level. With careful planning, the right tools, and attention to detail, you’ll be able to achieve clean and accurate results every time.
Stay patient, practice your technique, and always prioritize safety. Your craftsmanship will shine through in every project you complete! Thanks for reading this article on how to drill angled holes in wood.
About
Team Woodlix is a distinguished figure in the world of Diy design, with a decade of expertise creating innovative and sustainable Diy solutions. His professional focus lies in merging traditional craftsmanship with modern manufacturing techniques, fostering designs that are both practical and environmentally conscious. As the author of diy, Woodlix delves into the art and science of furniture-making, inspiring artisans and industry professionals alike.
Education RMIT University
(Melbourne, Australia) Associate Degree in Design (Team Woodlix) Focus on sustainable design, industry-driven projects, and practical craftsmanship. Gained hands-on experience with traditional and digital manufacturing tools, such as CAD and CNC software.
Nottingham Trent University
(United Kingdom) Bachelor’s in diyfastly.com and Product Design (Honors) Specialized in product design with a focus on blending creativity with production techniques. Participated in industry projects, working with companies like John Lewis and Vitsoe to gain real-world insights.
Publications and Impact
In diy, Team Woodlix his insights on indoor design processes, materials, and strategies for efficient production. His writing bridges the gap between artisan knowledge and modern industry needs, making it a must-read for both budding designers and seasoned professionals.
