

Water damage on a wood table can be both alarming and frustrating, especially when the table holds sentimental or monetary value. Even a small water ring or blotch can ruin the appearance and potentially compromise the structural integrity if left unchecked.
Fortunately, most water damage can be addressed with the right approach and materials. By understanding the causes and following a set of simple steps on how to fix water damage on wood table, you can restore your table’s beauty and extend its lifespan.
Understanding the Types of Water Damage
Not all water damage is the same. Surface marks, such as white rings or cloudy patches, are generally caused by water being trapped between the wood and its finish. These are typically easier to fix than more severe issues.
Deeper stains, darker spots, or areas where the wood feels soft may indicate that the water has soaked into the grain. This type of damage often requires more intensive repair methods and careful drying. Warping or swelling of the wood suggests significant exposure, possibly requiring sanding or even component replacement.
In extreme cases, mold or mildew may begin to form, which not only affects the wood’s appearance but can also pose health risks. Untreated water damage over time can cause splitting, cracking, or delamination of the wood layers.
Assessing the type and extent of your table’s water damage is an important first step before moving on to repairs. This will help you choose the most appropriate method and prevent further harm.
Tools and Materials You’ll Need
- Soft, Lint-free Cloths
- Mild Dish Soap and Water
- White Toothpaste or Baking Soda
- Petroleum Jelly or Mayonnaise
- Iron and Cotton Towel
- Fine Steel Wool (0000 Grade)
- Mineral Spirits
- Sandpaper (Various Grits: 120, 220, 320)
- Wood Filler (for Deep Damage)
- Wood Stain or Finish (Matching Your Table)
- Paintbrush or Sponge Applicator
- Protective Gloves
- Masking Tape
- Vacuum or Brush for Dust
8 Simple Step-By-Step Guidelines on How to Fix Water Damage on Wood Table
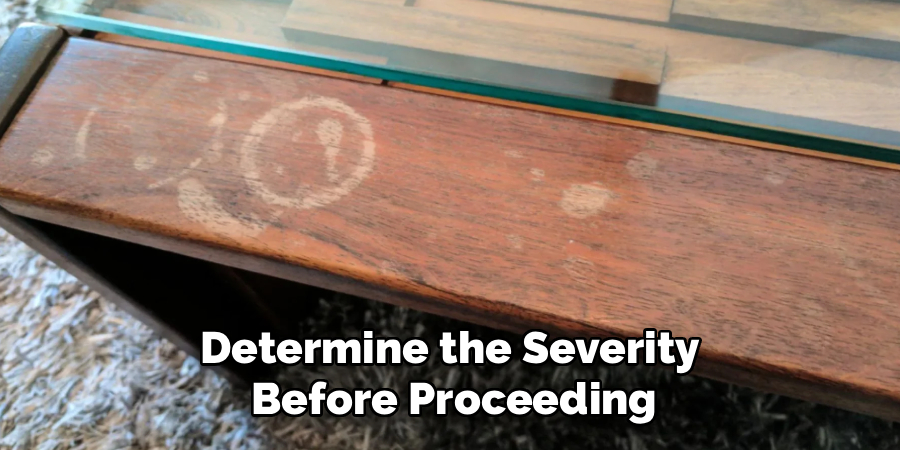
Step 1: Assess the Damage
Begin by thoroughly inspecting your wood table for signs of water damage. Look for discoloration, rings, swelling, or cracking. Identify whether the marks are surface-level or deeper within the wood.
It’s important to determine the severity before proceeding, as some solutions are best for minor damage while others are needed for more extensive problems. Taking photos can help you track progress and consult with professionals if necessary.
Step 2: Clean the Affected Area
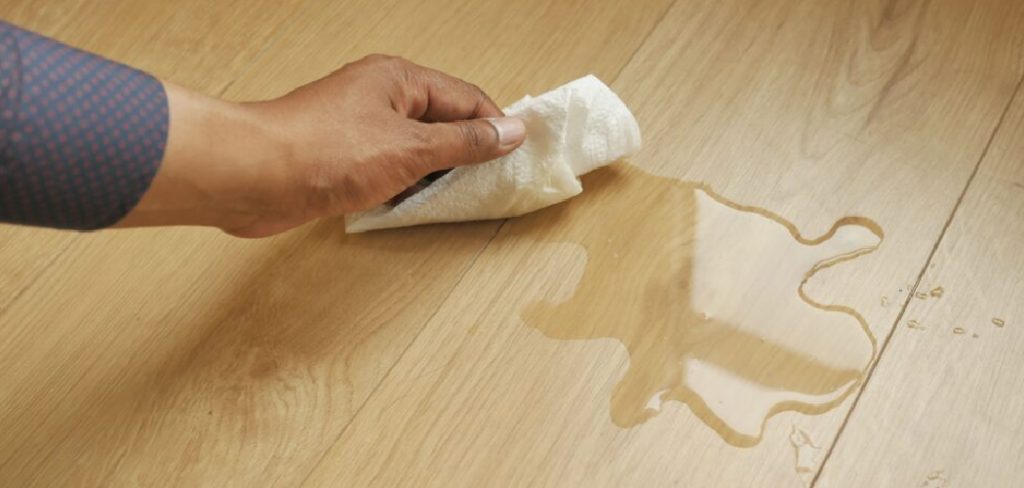
Gently clean the area using a soft cloth dampened with mild soapy water. Avoid soaking the wood; instead, lightly wipe to remove surface dirt, dust, and any residues left by the water.
Allow the table to air dry completely after cleaning. This prepares the wood for further treatment and helps you see the exact extent of the damage once the surface is clear.
Step 3: Remove Surface Stains (White Rings/Cloudiness)
For white water rings or cloudy spots, apply a small amount of non-gel toothpaste or a paste of baking soda and water using a clean cloth. Gently rub in the direction of the wood grain for a minute or two.
Wipe away excess and check your progress. Repeat as needed, but do not over-rub, as this might remove the finish. Once the stain is gone, wipe clean and allow the area to dry.
Step 4: Treat Deeper Stains
If stains persist or are darker, indicating deeper water penetration, try applying a thin layer of petroleum jelly or mayonnaise to the area. Let it sit overnight, as the oils can sometimes draw moisture out from beneath the finish.
Wipe the area clean in the morning with a soft cloth. If the spot becomes lighter, repeat the process once more before attempting more invasive methods.
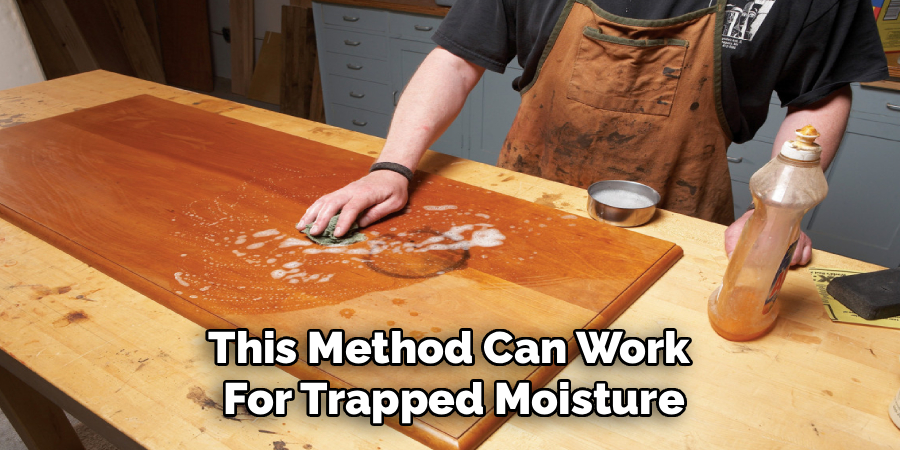
Step 5: Use an Iron for Persistent Marks
Cover the damaged area with a clean cotton towel. Set a household iron to low heat (no steam) and gently press it over the towel for a short period (10–15 seconds).
Check the spot by lifting the towel. This method can work for trapped moisture, drawing it out through evaporation. Take care not to overheat or burn the wood, and always let the area cool before repeating.
Step 6: Address Significant or Deep Damage
If the wood feels spongy or very dark, light sanding may be necessary. Start with fine sandpaper (220–320 grit), sanding gently along the grain. Remove only as much wood as needed to reach undamaged fibers.
Wipe away sanding dust and reassess. If damage remains, consider applying wood filler to restore any depressions or cracks. Allow filler to dry, then sand flush for a smooth, even surface.
Step 7: Refinish the Table
Once the damage is removed, apply a matching wood stain or finish to the area. Use a brush, rag, or sponge applicator to blend the repair with surrounding surfaces.
Allow the finish to dry per the manufacturer’s instructions. Apply additional coats as needed to achieve an even look. Finish by buffing gently with a soft cloth.
Step 8: Restore Table to Use and Maintain
After repairs are complete and the new finish is dry, replace or return the table to its normal location. Handle with care for the first several days.
Regular dusting and prompt cleanup of spills will keep your table looking its best. Consider using coasters, placemats, or tablecloths to prevent future water marks. Following these steps on how to fix water damage on wood table will help you preserve your table’s beauty and extend its lifespan. With proper care, it can be a cherished piece for generations to come.
Tips for Best Results
Start with the gentlest method and only move to more drastic measures if necessary. Patience and careful attention to detail will give you the best chance at a seamless repair.
Always test cleaning agents or abrasives on a hidden part of the table first to ensure they won’t cause unwanted damage. Wearing gloves can protect both your hands and the wood from oils or residues.
Use plenty of clean, soft cloths and always work in a well-ventilated area, especially when applying stains or mineral spirits. Keeping a steady hand and working with the grain of the wood prevents visible scratches.
If the repair area is large or highly visible, take extra time to match the finish as closely as possible. Good lighting will help you see subtle differences in color and texture.

Preventing Future Water Damage
To help prevent future incidents, always use coasters or placemats under drinks and hot dishes. Wipe up spills immediately and keep the table away from direct sunlight or heat sources. Maintain protective finishes with periodic reapplication as needed.
Use a humidifier during dry seasons to reduce wood movement and prevent cracks.
When to Call a Professional?
If the table is an antique, has significant sentimental value, or you notice extensive warping, splitting, or mold growth, it’s best to contact a professional restorer. Large, deep stains that return after treatment may indicate underlying structural issues that require expertise.
Attempting extensive repairs yourself can sometimes worsen the damage, especially if you’re unfamiliar with woodworking techniques. A professional can assess the table’s condition and recommend specialized restoration.
When in doubt, opting for professional help preserves both the appearance and value of your table.
Frequently Asked Questions
Q1: How Can I Tell if the Damage Is Only on the Surface or Deeper?
Surface damage usually appears as white rings, cloudiness, or light discoloration that sits above the wood grain. If you see darker spots or feel soft or spongy wood, it may signal deeper water penetration. Deeper stains can require advanced treatments or consultation with a professional.
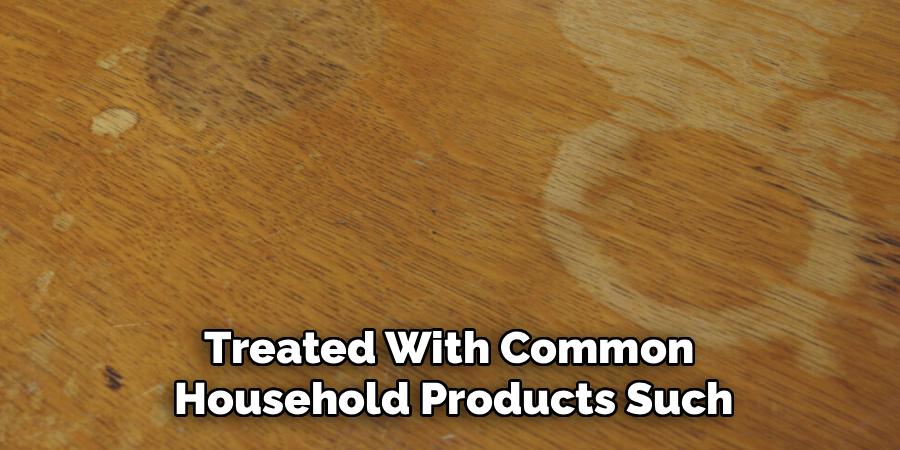
Q2: Can I Use Household Items to Remove Water Stains from My Table?
Yes, many water stains can be treated with common household products such as toothpaste, baking soda, or mayonnaise. These gentle methods are effective for light or moderate stains and do not usually harm the wood’s finish. However, always test a small area first and use a gentle touch for best results.
Q3: Is It Safe to Sand the Table Myself?
Sanding can be a safe and effective way to remove deeper water stains, provided you use fine sandpaper and go slowly. Sand in the direction of the grain and remove only as much material as needed. Avoid aggressive sanding, which can result in uneven surfaces or loss of the wood’s original character.
Q4: What Should I Do If the Damage Comes Back After Repairing?
If the same spots reappear after an initial repair, it may indicate hidden moisture or insufficient drying. Sometimes, moisture can be trapped deep within the wood and rise back to the surface. Repeat the drying process and, if necessary, seek professional advice for a more thorough restoration.
Conclusion
Water damage to a wood table can seem daunting, but with proper care and methodical repair, you can restore both beauty and function. By understanding the type of damage and following step-by-step guidelines on how to fix water damage on wood table, most issues can be resolved successfully.
Remember, prevention is just as important as repair. Prompt attention to spills, regular maintenance, and protective measures will keep your wood table looking its best for years to come.
About
Team Woodlix is a distinguished figure in the world of Diy design, with a decade of expertise creating innovative and sustainable Diy solutions. His professional focus lies in merging traditional craftsmanship with modern manufacturing techniques, fostering designs that are both practical and environmentally conscious. As the author of diy, Woodlix delves into the art and science of furniture-making, inspiring artisans and industry professionals alike.
Education RMIT University
(Melbourne, Australia) Associate Degree in Design (Team Woodlix) Focus on sustainable design, industry-driven projects, and practical craftsmanship. Gained hands-on experience with traditional and digital manufacturing tools, such as CAD and CNC software.
Nottingham Trent University
(United Kingdom) Bachelor’s in diyfastly.com and Product Design (Honors) Specialized in product design with a focus on blending creativity with production techniques. Participated in industry projects, working with companies like John Lewis and Vitsoe to gain real-world insights.
Publications and Impact
In diy, Team Woodlix his insights on indoor design processes, materials, and strategies for efficient production. His writing bridges the gap between artisan knowledge and modern industry needs, making it a must-read for both budding designers and seasoned professionals.