

Wood cabinets can breathe warmth and elegance into any space, but over time, they can become dull, scratched, or stained from constant use. Restoring these cabinets can dramatically enhance the appearance of your kitchen or bathroom and add value to your home.
Understanding the proper steps and care techniques is key to reviving their natural beauty. With patience and the right approach, you can restore your wood cabinets, giving them a fresh and polished look that lasts for years. In this article on how to restore wood cabinets, we’ll cover the essential steps and tips to help you achieve stunning results.
Why Restore Wood Cabinets?
Restoring wood cabinets is an excellent way to breathe new life into your home without the expense of a full replacement. Over time, cabinets can accumulate scratches, stains, and a dull finish due to daily wear and tear. Restoring them not only improves their aesthetic appeal but also enhances their durability by addressing existing damage and protecting against future wear.
Additionally, restoring your cabinets is an environmentally friendly option, as it reduces waste and minimizes the need for new materials. Whether you’re updating your kitchen or refreshing your bathroom, restoring wood cabinets allows you to maintain the character of your space while achieving a cost-effective and sustainable solution.
Tools and Materials You’ll Need
- Screwdriver
- Drop Cloths or Plastic Sheeting
- Mild Detergent or Wood Cleaner
- Soft Cloths and Sponges
- Sandpaper (Medium and Fine Grit)
- Wood Filler
- Putty Knife
- Wood Stain or Paint (Optional)
- Protective Gloves
- Safety Goggles
- Paintbrush or Foam Applicator
- Clear Varnish or Polyurethane Finish
9 Step-By-Step Guidelines on How to Restore Wood Cabinets
Step 1: Remove Cabinet Hardware
Start by removing all cabinet doors, drawers, and hardware, including knobs, handles, and hinges. Be sure to keep all screws and parts organized so reassembly is straightforward later.
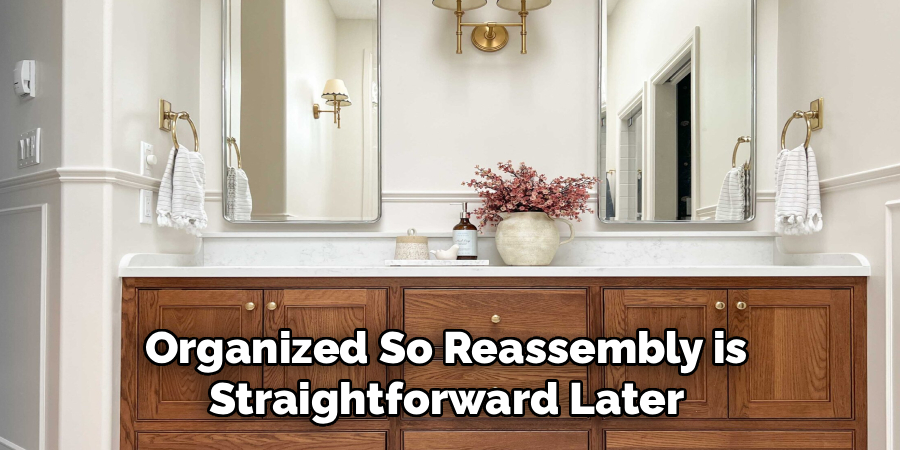
This makes the restoration process much easier and ensures that you reach every surface evenly. Lay the doors and drawers on a drop cloth in a well-ventilated workspace.
Step 2: Clean All Surfaces Thoroughly
Mix a mild detergent or specialized wood cleaner with warm water. Use a soft cloth or sponge to gently clean all cabinet surfaces, paying special attention to corners and crevices where grime tends to build up.
Thorough cleaning removes grease, dirt, and residues, providing a clean base for the steps that follow. Be sure to let everything dry completely before moving to the next stage.
Step 3: Inspect for Damage and Make Repairs
Closely examine all parts of the cabinets for signs of damage, such as scratches, dents, or loose joints. Use a wood filler and a putty knife to fix any imperfections, smoothing it out evenly with the surrounding surface.
Allow the filler to dry according to the manufacturer’s instructions. Once dry, lightly sand the repaired areas to ensure a level and seamless finish.
Step 4: Sand the Cabinet Surfaces
Gently sand all exterior and interior surfaces of the cabinets using medium-grit sandpaper first, followed by fine-grit sandpaper for a smooth touch. Sand in the direction of the wood grain to avoid scratches.
This process helps remove the old finish and opens the pores of the wood, allowing the new stain or paint to adhere properly. Make sure to wipe away dust with a clean, damp cloth before proceeding.
Step 5: Consider Staining or Painting
If you want to change or refresh the color, this is the time to apply a wood stain or paint. Use a paintbrush or foam applicator to evenly coat the surfaces, following the wood grain for a natural look.
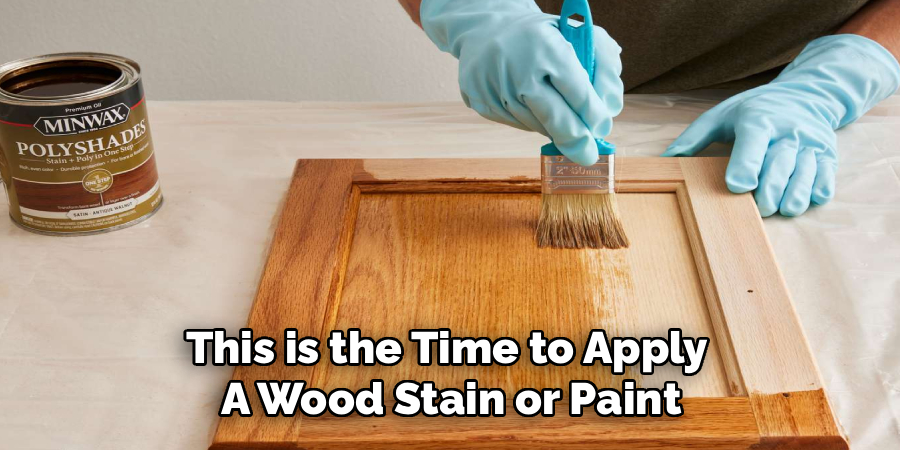
Apply multiple thin coats, allowing adequate drying time between each. A new finish can dramatically update your cabinet’s style while protecting the wood underneath.
Step 6: Apply Protective Finish
Once your stain or paint is completely dry, it’s important to apply a clear coat of varnish or polyurethane. This step shields the wood from daily wear and moisture.
Apply the protective coat in thin, even layers, allowing each coat to dry fully before adding the next. A durable finish will keep your cabinets looking new much longer.
Step 7: Let Cabinets Cure Fully
After applying the final coat of finish, allow the cabinets plenty of time to cure. This ensures that the surface is hard and resistant to fingerprints or damage from everyday use.
During this period, avoid handling or reattaching hardware. Good curing time is crucial for lasting results and a flawless appearance.
Step 8: Reattach Hardware and Cabinet Parts
Once the cabinets are fully cured, carefully reinstall all doors, drawers, and hardware. Tighten all screws and check that everything functions smoothly.
This step brings the restoration process together, making your wood cabinets both beautiful and fully operational again.
Step 9: Final Cleaning and Polishing
Give your cabinets one last cleaning to remove any dust or fingerprints that may have settled during reassembly. Use a soft, lint-free cloth and a gentle wood polish for extra shine.
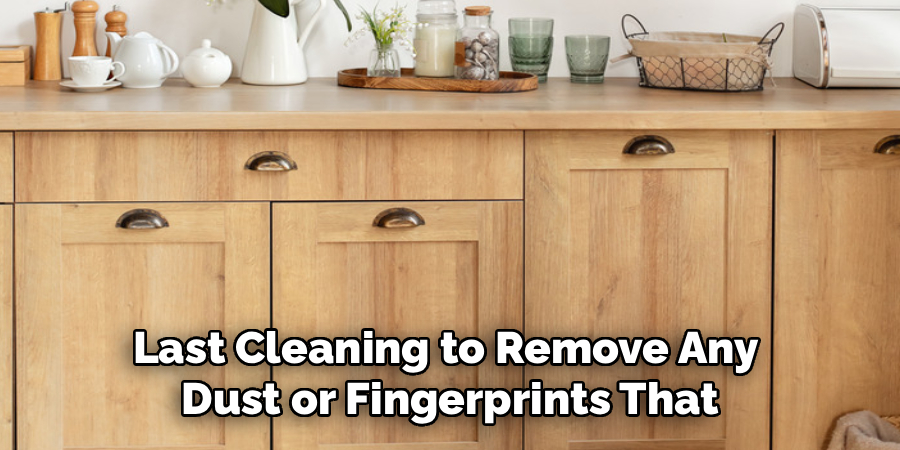
Take a moment to appreciate the restored look of your cabinets. Regular care will help preserve this renewed beauty for years to come.
Following these steps on how to restore wood cabinets will not only save you money but also give you a sense of accomplishment. So grab your tools and get to work, and soon enough, your wood cabinets will be looking brand new again!
Maintenance Tips
To keep your wood cabinets looking their best, regular maintenance is key. Start by wiping down the surfaces weekly with a damp, soft cloth to remove dust and grime. Avoid using harsh chemicals or abrasive materials, as these can damage the finish. Apply a high-quality furniture polish every few months to maintain the shine and protect the wood from drying out.
Additionally, address spills immediately to prevent staining or moisture damage. If your cabinets are in a high-humidity area, consider using a dehumidifier to help protect the wood from warping. With these simple steps, your restored cabinets will remain beautiful and functional for years to come.
Do You Need To Use Professionals?
While restoring cabinets can be a rewarding DIY project, there are certain situations where hiring professionals may be the best option. If the cabinets have significant structural damage, intricate designs, or require rare materials for restoration, professional expertise can ensure a high-quality finish.
Professionals have access to specialized tools and products that might not be easily available to a homeowner and are skilled at handling complex repairs like replacing warped panels or refinishing intricate carvings. Additionally, their experience can save time and reduce the risk of costly mistakes, especially if you’re unfamiliar with restoration techniques. It ultimately depends on your skill level, the extent of the restoration needed, and the time you are willing to invest.
How Much Will It Cost?
The cost of hiring professionals to restore cabinets depends on factors such as the size of the project, the extent of the damage, and the materials required. On average, professional cabinet restoration can range from $1,000 to $5,000 or more, depending on the complexity of the work. Smaller projects or basic refinishing might fall on the lower end of the spectrum, while custom repairs or restoring antique cabinets could be significantly more expensive.
If you choose to handle the restoration yourself, the expenses generally include the cost of materials like sandpaper, stain, paint, and protective finishes, which can range from $50 to $300 or more, depending on the size and scope of the job. Aligning your budget with your project needs is essential to ensure a successful restoration.
Frequently Asked Questions:
Q1: How Long Does It Take to Restore Wood Cabinets?
Restoring wood cabinets typically takes several days, depending on the extent of repairs and the drying time needed between steps. Rushing the process can result in a less durable finish, so it’s best to allow each step to be completed thoroughly and carefully. Larger kitchen projects may take up to a week for optimal results.
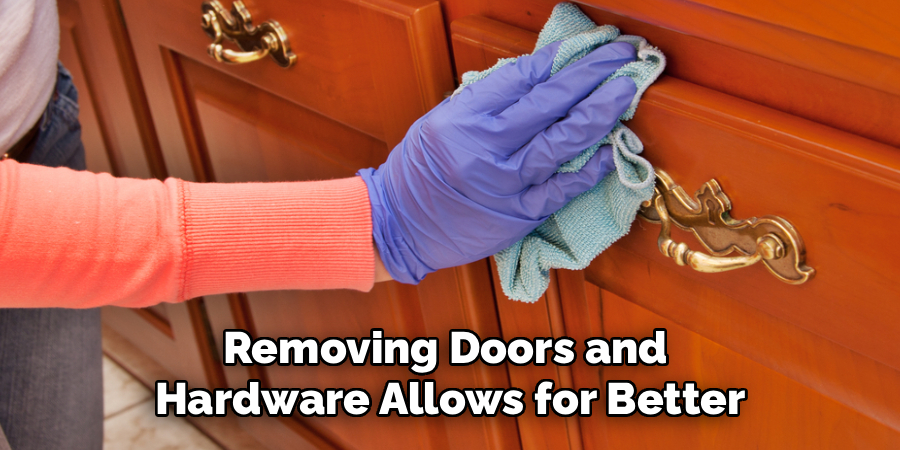
Q2: Can I Restore Cabinets Without Removing Doors and Hardware?
While it’s possible to restore cabinets in place, removing doors and hardware allows for better access and more even coverage. This step helps achieve a professional finish and prevents damage to hardware. Ultimately, the choice depends on your time and workspace, but removal is strongly recommended for best results.
Q3: What Kind of Finish Should I Use for Kitchens?
For areas like kitchens, a durable and moisture-resistant finish such as polyurethane or varnish is recommended. These finishes provide excellent protection against spills, stains, and daily wear. Always opt for products labeled as food-safe and suitable for wood surfaces to ensure longevity and safety in your kitchen environment.
Q4: How Often Should I Refinish My Wood Cabinets?
Most wood cabinets only need refinishing every 5 to 10 years, depending on usage and exposure to moisture or sunlight. Regular maintenance can greatly extend the intervals between refinishing. If you notice fading, scratches, or dullness, these are clear signals that it’s time to refresh your cabinet finish.
Conclusion
Restoring wood cabinets is a rewarding project that can transform your space, enhance home value, and extend the life of your cabinetry. By following these detailed steps on how to restore wood cabinets and incorporating good maintenance habits, you can enjoy beautiful, functional wood cabinets for many years to come.
Don’t hesitate to tackle this project—renewed cabinets may be just what your home needs to feel refreshed and inviting again.
About
Team Woodlix is a distinguished figure in the world of Diy design, with a decade of expertise creating innovative and sustainable Diy solutions. His professional focus lies in merging traditional craftsmanship with modern manufacturing techniques, fostering designs that are both practical and environmentally conscious. As the author of diy, Woodlix delves into the art and science of furniture-making, inspiring artisans and industry professionals alike.
Education RMIT University
(Melbourne, Australia) Associate Degree in Design (Team Woodlix) Focus on sustainable design, industry-driven projects, and practical craftsmanship. Gained hands-on experience with traditional and digital manufacturing tools, such as CAD and CNC software.
Nottingham Trent University
(United Kingdom) Bachelor’s in diyfastly.com and Product Design (Honors) Specialized in product design with a focus on blending creativity with production techniques. Participated in industry projects, working with companies like John Lewis and Vitsoe to gain real-world insights.
Publications and Impact
In diy, Team Woodlix his insights on indoor design processes, materials, and strategies for efficient production. His writing bridges the gap between artisan knowledge and modern industry needs, making it a must-read for both budding designers and seasoned professionals.